

Why Won’t My Baby Eat Baby Food? 10 Tried-and-True Recipes for Starting Solids

Baby food bowls with homemade vegetable and fruit purees for starting solids, featuring broccoli, apples, and baby spoons in a bright kitchen setting.

There’s something strangely funny about spending months worrying about starting solids and whether your baby will even like baby food… only for them to literally spit the very first bite right back at you. 🙂 The truth is, the baby food stage is often nothing like the perfect Pinterest pictures.

One day you feel like a mini chef proudly serving organic sweet potato puree, and the next day you’re just happy if your baby even tastes a banana.

And honestly? That’s completely normal.

Introducing baby food is one of those parenting stages that everyone remembers a little differently. For some parents, everything clicked almost immediately. For others, it took several tries before their baby finally started enjoying certain foods.

If you’re getting close to that very first spoonful, or you’re overwhelmed with questions about when, what, and how to feed your baby, you’ll find a few helpful tips, simple recipes, and realistic approaches here that can actually work during those first weeks of starting solids at home.

Baby eating baby food from a spoon while sitting in a high chair, showing the early stages of starting solids and healthy baby feeding.

When Does That Big Moment Finally Come?

One of the most common questions parents ask is: when should I actually start solids? Most pediatricians recommend introducing solid foods around 6 months old, although many babies may be ready somewhere between 4–6 months if they’re showing the right signs.

So what are those signs exactly? Your baby can hold their head up more steadily, watches you eat with curiosity, doesn’t automatically push food back out with their tongue, and can sit with some support. If you’re starting to notice these little milestones, there’s a good chance your baby is getting ready for those very first baby food adventures.

In recent years, the Baby-Led Weaning (BLW) approach has also become incredibly popular. Instead of starting only with purées, babies are offered soft, easy-to-grab pieces of food that they can bring to their mouths on their own. For many parents, this idea sounds a little scary at first, but most experts agree that you don’t have to choose just one method. Spoon-feeding and soft finger foods can absolutely work together.

What matters most is not following internet pressure or trying to do everything perfectly. The most important thing is following your baby’s pace and checking in with your pediatrician, because every baby develops differently.

👉 If starting solids feels exciting and slightly terrifying at the same time, this video is absolutely worth watching. In this honest and practical conversation, the doctors behind the popular Doctors Bjorkman channel explain Baby-Led Weaning, first foods, choking fears, allergens, and how to know if your baby is actually ready for solids. What makes this video especially refreshing is that it doesn’t push perfection — it focuses on realistic parenting, safe feeding, and finding an approach that works for your baby and your family.

First Foods: What to Offer and What to Watch For

For a long time here in the United States, rice cereal was considered one of the most popular first baby foods. In recent years, though, that has started to change. Several studies raised concerns about arsenic levels in some rice-based products, so many parents now prefer starting solids with foods like sweet potato, avocado, or pear purée instead.

Baby food purees in white bowls with apple, carrot, and green vegetable puree on a table, featuring homemade baby food recipes for babies refusing purees and starting solids.

According to many moms’ experiences, babies also tend to enjoy these flavors much more naturally.

One of the most helpful tips many parents follow is the so-called “three-day rule.”

This means introducing the same baby food for three consecutive days before trying something new.

Doing this makes it much easier to notice if your baby reacts poorly to a specific food — whether that’s a rash, tummy issues, or another unusual physical reaction.

This can be especially important if there’s already a history of food allergies in the family.

In recent years, research has also shifted the conversation around allergens. Today, many experts support the early and gradual introduction of certain allergenic foods, such as eggs or peanuts, because it may actually help lower the risk of developing food allergies later on. Of course, these foods should always be introduced carefully and with guidance from your pediatrician, since every baby’s body can respond differently.

The Never-Ending Debate: Store-Bought or Homemade Baby Food?

During the starting solids stage, almost every mom eventually asks herself the same question: should I buy baby food or make it at home? Some parents swear by store-bought baby food, while others prefer cooking everything themselves. The truth is, though, that the two can absolutely work side by side. Many parents also became more cautious after the widely discussed 2021 investigation that found heavy metals in several well-known baby food brands.

That news pushed a lot of moms toward homemade baby food because, honestly, there’s something reassuring about knowing exactly what’s going onto your baby’s plate. If you’d rather make your own baby food at home, there are a few important things worth keeping in mind. Babies under one year old should not have added salt or honey, and vegetables are usually best steamed instead of boiled so they keep more of their nutrients.

During the first weeks, many moms thin purées with breast milk or formula to make them easier for babies to eat. The batch cooking method can also be a lifesaver: you make a larger batch at once, freeze it in smaller portions, and always have something ready to go. And honestly? Some days it feels amazing knowing there’s already a portion of homemade baby food waiting in the freezer.

👉 If you’ve also been wondering when to start solids, which foods to introduce first, and how to make those first bites easier, in “Introducing Solids Step by Step: What, When, and How to Feed Your Baby” we’ll guide you through the early stages step by step — with practical tips, simple ideas, and plenty of real-life parenting experiences.
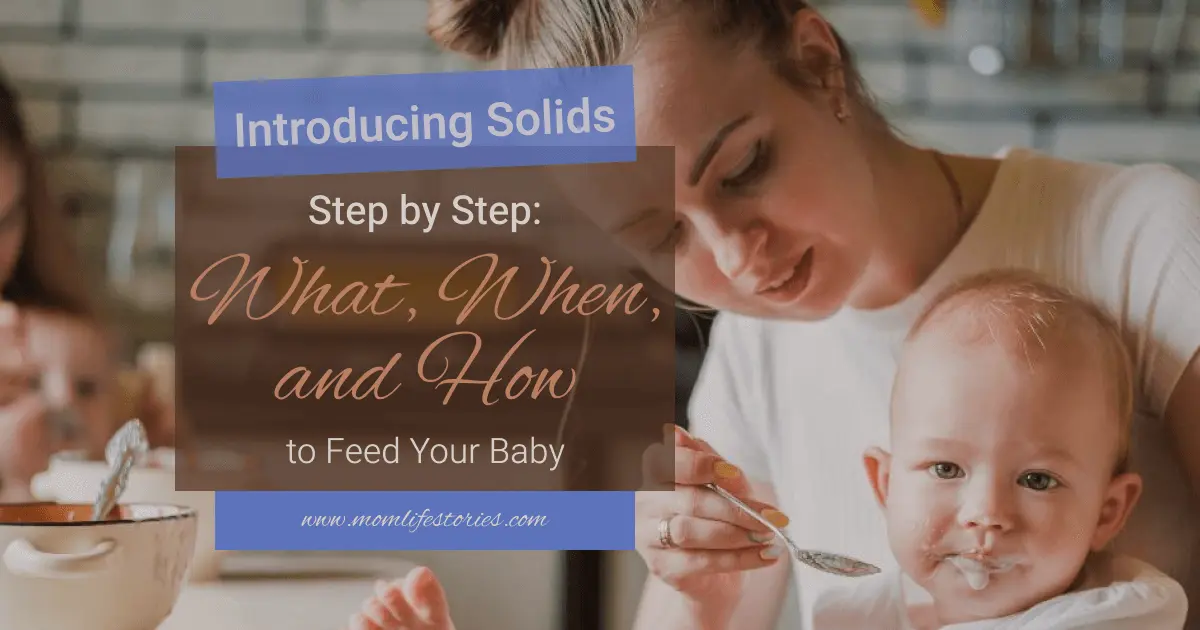
Parent feeding a baby in a high chair during the early stage of introducing solids and exploring new foods

10 Great Starter Recipes Your Baby Will Probably Love

The following 8 baby food recipes are some of the most popular first foods parents start with. They’re simple to make, easy to prepare in larger batches, and usually enough for about four servings, which makes those busy feeding days a little easier. Even better, most babies tend to enjoy these flavors right from the beginning, making them a great starting point during the early stages of introducing solids.

The classic starter baby food. The natural sweetness of sweet potato combined with the fruity flavor of apple is usually an instant hit with babies. Simply steam or roast both until soft, then blend until smooth. It’s rich in beta-carotene and fiber, and it’s also gentle on your baby’s digestion.

Makes 4 servings

INGREDIENTS

  • 300 g sweet potato
  • 2 large apples
  • Breast milk or formula for thinning

STEPS

1. Roast the ingredients:
Preheat your oven to 400°F (200°C). Wash the sweet potato and apples thoroughly. Place the sweet potato whole and the apples halved on a baking sheet, then roast until soft.

2. Cool and prepare:
Remove from the oven and allow everything to cool slightly. Peel the sweet potato and cut it into smaller pieces.

3. Blend until smooth:
Place the roasted sweet potato and apples into a blender or use an immersion blender to purée until smooth. Add breast milk or formula as needed until you reach a soft, creamy texture that’s easy for your baby to swallow.

NOTES

Freezer-friendly: Freeze portions in an ice cube tray or freezer-safe bag for up to 3 months. You can also mix it with pear or carrot for extra variety.

The creamy combination of avocado and banana is one of the most popular starter baby foods in the United States. It’s simple, filling, and packed with healthy fats, fiber, and important nutrients, which is why many parents consider it a true superfood during the early stages of starting solids.

  • 1 ripe avocado
  • 1 ripe banana
  • 2 tablespoons breast milk or formula (optional, for thinning)

1. Prepare the avocado:
Cut the avocado in half, remove the pit, and scoop the flesh into a small bowl.

2. Add the banana:
Peel the banana, break it into smaller pieces, and add it to the avocado.

3. Mash and blend:
Using a fork or immersion blender, mash the avocado and banana together until smooth. If needed, add a little breast milk or formula to create a creamier, easier-to-swallow texture.

Because of the avocado, this baby food doesn’t freeze well and may turn brown quickly, so it’s best served fresh. If you have leftovers, a little lemon juice can help slow browning for a few hours in the refrigerator. Around 8 months old, it can also be served as soft finger food pieces.

A classic American baby food favorite — naturally sweet, gentle on tiny tummies, and great for digestion.

  • 3 large apples (such as Gala or Fuji), peeled and cored
  • 60 ml water

1. Prepare the apples:
Peel the apples, remove the cores, and cut them into small cubes.

2. Steam the apples:
Place the apple pieces into a small saucepan, pour in the water, cover with a lid, and steam over low heat until soft.

3. Let cool slightly:
Once the apples are soft enough to easily pierce with a fork, remove them from the heat and allow them to cool for a few minutes.

4. Blend until smooth:
Using a blender or immersion blender, purée the apples until completely smooth. If needed, add a little extra water or breast milk to reach the desired consistency.

Apples naturally contain pectin, which can help support digestion. This purée also pairs beautifully with pear or peach. Store in the refrigerator for up to 3 days or freeze for up to 1 month.

  • 3 ripe pears, peeled, cored, and diced
  • 4 tablespoons finely ground oats (baby oatmeal)
  • 150 ml water
  • 1 pinch cinnamon (optional, recommended for 7+ months)
  • 2 tablespoons breast milk or formula (for thinning)
  1. Place the diced pears and water into a small saucepan and cook over low heat for about 8–10 minutes, until the pears become soft.
  2. Add the oatmeal and continue cooking for another 3–4 minutes, stirring constantly until the mixture thickens.
  3. If using cinnamon, add it now, then remove the saucepan from the heat and allow the mixture to cool slightly.
  4. Blend until smooth using an immersion blender, then thin with breast milk or formula until you reach the desired consistency. Serve warm.

💡 Tip

Oatmeal provides slow-release carbohydrates and fiber, helping babies stay fuller for longer. The natural sweetness of pear means there’s no need for added sugar. It also makes a perfect baby breakfast for a cozy, energy-filled morning.

A cozy fall favorite — naturally sweet, packed with vitamins, and made extra comforting with a tiny pinch of cinnamon. This gentle baby food can usually be introduced from around 7 months old.

  • 400 g pumpkin (peeled and deseeded)
  • 80 ml water (for steaming)
  • 3 tablespoons breast milk or formula (optional, for thinning)
  • 1 pinch ground cinnamon

1. Prepare the pumpkin:
Peel the pumpkin, remove the seeds, and cut it into roughly 2 cm cubes.

2. Steam until soft:
Place the pumpkin cubes into a saucepan, add the water, cover with a lid, and steam over low heat until completely soft.

3. Let cool slightly:
Remove from the heat and allow the pumpkin to cool for a few minutes.

4. Blend until smooth:
Using an immersion blender or regular blender, purée the pumpkin until silky smooth. If needed, add breast milk or formula to create a creamier consistency.

5. Add the cinnamon:
Before serving, sprinkle a tiny pinch of cinnamon over the top. It’s best not to fully mix it in, so the flavor stays gentle and not too overwhelming for your baby.

Freezer-friendly: Freeze in ice cube trays without the cinnamon, then add the cinnamon fresh when serving. Keeps in the refrigerator for up to 3 days and pairs beautifully with carrot or sweet potato.

A wonderful source of plant-based protein — the natural sweetness of pear perfectly balances the stronger flavor of green peas. When strained, this purée becomes extra silky and smooth, making it a great option from around 7 months old.

  • 200 g frozen or fresh green peas
  • 2 pears (about 300 g), peeled and cored
  • 60 ml water

1. Prepare the ingredients:
Peel and core the pears, then cut them into small cubes. Place them into a saucepan together with the green peas and water.

2. Steam until soft:
Cover with a lid and cook over low heat until the pears are soft and the peas are fully cooked.

3. Cool and blend:
Remove from the heat, allow the mixture to cool slightly, then blend until completely smooth using an immersion blender or regular blender.

4. Strain for a silky texture:
For an extra smooth consistency, press the purée through a fine mesh strainer. This helps remove the tiny pea skin pieces that can sometimes make the texture grainy.

Tiny pea skin pieces can sometimes make the texture less smooth, so straining is highly recommended for younger babies. Store in the refrigerator for up to 2 days or freeze for up to 1 month.

  • 300 g sweet potato, peeled and diced
  • 200 g broccoli florets
  • 2 tablespoons breast milk or formula (for thinning)
  • 1 teaspoon extra virgin olive oil
  1. Place the sweet potato cubes into a steamer basket and steam for about 15 minutes, until soft.
  2. Add the broccoli florets and continue steaming for another 6–8 minutes, until everything is tender.
  3. Transfer the vegetables to a blender together with the olive oil, then gradually add the breast milk or formula until you reach the desired consistency.
  4. Before serving, test the temperature carefully — it should be warm, not too hot.

NOTES

Broccoli is rich in iron and vitamin C, while sweet potato is packed with beta-carotene, making them a true nutrient-rich duo. If your baby isn’t used to stronger flavors yet, start with a little more sweet potato and less broccoli at first.


A great first meat-based baby food to introduce — the protein-rich chicken breast and the naturally creamy sweet potato make a comforting, balanced combination. Suitable from around 8 months old.

  • 150 g chicken breast (skinless and boneless)
  • 300 g sweet potato (peeled)
  • 150 ml low-sodium chicken broth or water (for cooking and thinning)

1. Prepare the ingredients:
Wash the chicken breast and cut it into smaller pieces. Peel the sweet potato and cut it into cubes.

2. Cook the chicken:
Place the chicken pieces into a saucepan, pour in the broth or water, and cook over medium heat until fully tender. Skim off any foam that forms while cooking.

3. Steam the sweet potato:
In a separate saucepan, steam the sweet potato cubes with a small amount of water until soft.

4. Blend until smooth:
Allow everything to cool slightly, then place both the chicken and sweet potato into a blender or use an immersion blender. Add enough broth or water to create a smooth, creamy texture that’s easy for your baby to swallow.

Do not add salt, spices, or seasonings, since babies’ kidneys are still too sensitive for added salt at this age. If you don’t have low-sodium broth, plain water works perfectly well. This purée freezes beautifully in ice cube trays and can be stored for up to 1 month. You can also mix it with carrot or broccoli for extra variety.

  • 250 g carrots, peeled and sliced
  • 100 g red lentils, thoroughly rinsed
  • 400 ml water (for cooking)
  • ½ teaspoon cumin seeds
  • 1 tablespoon breast milk or formula (for thinning)
  1. Place the red lentils and carrot slices into a small saucepan with the water, then simmer over low heat for about 20 minutes, until the lentils and carrots are completely soft.
  2. Add the cumin seeds and cook for another 2 minutes to allow the flavors to blend.
  3. Reserve a small amount of the cooking liquid, then use an immersion blender to purée everything until completely smooth.
  4. Thin the purée with breast milk, formula, or the reserved cooking liquid until you reach a creamy consistency. Serve warm.

💡 Tip

Red lentils are an excellent source of plant-based protein and are usually very easy for babies to digest. The cumin may also help reduce bloating and tummy discomfort, which can be especially helpful during the early stages of starting solids.

Freezer-friendly: Portion into ice cube trays and freeze for up to 3 months.

The perfect finger food — rich in protein and vitamins, and baked in the oven. Suitable from 10 months and up.

  • 2 eggs
  • 2 tablespoons fresh spinach, finely chopped
  • 2 tablespoons carrot, finely grated
  • 1 tablespoon grated cheese (optional)
  1. Preheat the oven: Preheat your oven to 350°F (180°C). Lightly grease a mini muffin tin or line it with paper muffin liners.
  2. Mix the ingredients: In a bowl, whisk the 2 eggs. Add the finely chopped fresh spinach, grated carrot, and the grated cheese if using. Mix well.
  3. Fill the muffin tin: Pour the egg mixture into the mini muffin cups, filling each about ¾ full.
  4. Bake: Place the tray in the oven and bake until the muffins are fully cooked in the center and lightly golden on top.
  5. Cool and serve: Remove from the oven and let the muffins cool in the tray for a few minutes before taking them out. Serve warm.

Do not add salt! The cheese provides enough salt if you use it. You can also make these with broccoli, bell peppers, or green peas. Store in the refrigerator for up to 2 days, and they freeze well too — just reheat before serving. For older babies, serve whole. For younger babies, cut into halves or quarters.

What Else Is Good to Know About Starting Solids?

When it comes to starting solids, it’s not just about what your baby eats — it’s also about getting used to different textures over time. Babies usually begin with very smooth purées, then gradually move toward thicker textures and soft finger foods. Around 6 months, most babies start with smooth purées, by 7–8 months many are ready for slightly chunkier foods, and around 9–10 months they often begin experimenting with soft bite-sized pieces.

Homemade baby food made with sweet potato and apple, featuring simple baby food ideas and homemade baby snack recipes for babies refusing purees and starting solids.

There are also a few important things worth keeping in mind during this stage. If your baby refuses a food, try not to force it. Pressure can easily turn mealtime into a negative experience. It also helps not to rely only on sweet flavors in the beginning, since babies may later become more resistant to vegetables and savory foods.

Pouch-style baby foods can definitely be convenient while traveling or during busy days, but relying on them too heavily may limit opportunities to practice chewing, spoon-feeding, and self-feeding skills.

And honestly, this may be the most important thing of all: starting solids is not a race. Some foods need to be offered 10–15 times before a baby truly accepts them. That’s completely normal. Learning new tastes and textures takes time, patience, and lots of repetition.

And if you ever feel unsure about something, your pediatrician or a pediatric nutrition specialist will always be a more reliable source than endless internet advice.

👉If you’d like to walk this journey feeling more prepared, more confident, and a little less worried, visit the Little Lifesavers page and explore our free downloadable resources. They’ll help you stay organized, plan ahead, and create the kind of calm and clarity you need most right now.

Leave a Reply

Your email address will not be published. Required fields are marked *